

This post is also available in: Italian
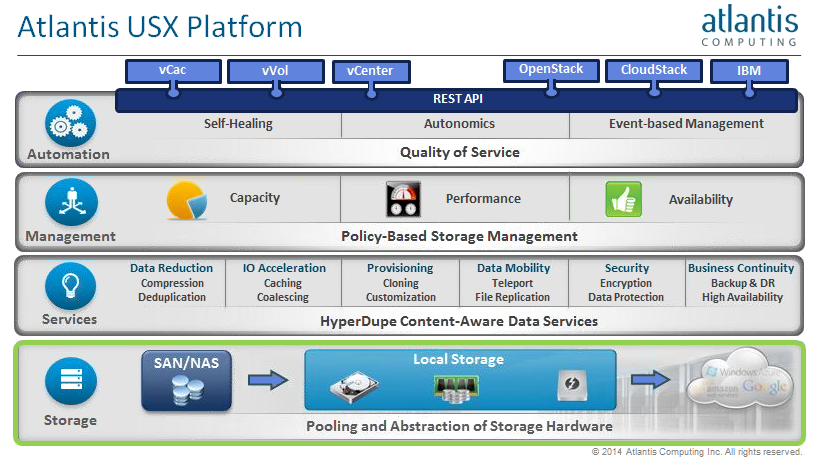
Reading Time: 7 minutesAtlantis USX (Unified Software-defined Storage) is a software-defined storage solution (100% software) that delivers the performance of an all-flash storage array at half the cost of traditional SAN or NAS.
First version was announced one year ago (February 2014) and actually there is the version 2.0 (announced on August 2014) with several interesting features.
The product is quite interesting and is both a storage virtualization layer and also a full SDS storage solution. The first aspect may possible add new features to existing storage, like, for example, (in the next release) add VMware Virtual Volumes support.
Atlantis USX is distribuited as a OVF virtual appliance that can be deployed on an existing VMware vSphere environment (actually is not so easy deploy it on a Workstation lab, because you have to provide serveral parameters during the VA deployment).
The installation and configurations phases are not so easy, because there are several steps and you have to understand some basic concepts, but it’s all well documented and there is also a great blog post for getting started with Atlantis USX that provide a basic installation scenario and the related configuration guide:
- Part 1: Overview and Architecture
- Part 2: Installation and Configuration
- Part 3, Deploying a Hybrid SAN/NAS Volume
- Part 4, Deploying a Hybrid DAS Volume (aka Hyper-Converged)
Architecture
Atlantis USX enables to pool and abstract storage (NAS, SAN, DAS) to create purpose built volumes for applications, virtual machines, or large scale workloads. But also to provide new features like HA, deduplication, caching, compression, ….
 Deployment

Altantis USX is imported into a vSphere environment by using the familiar “Deploy OVF Template” process. The OVF process is fairly straight forward, simply login to your vSphere client and select File –> Deploy OVF Template. Browse to the path of the USX Manager OVF and follow the wizard.
A couple key questions to fill out when importing the virtual appliance are shown below:

You are going to import the management VA (note that is a 32 bit VM), but it will not the only VA that you will have, because after this step other VA will be (automatically) deployed:
- One 64 bit Ubuntu Linux VA for each host
- One 64 bit Ubuntu Linux VA for each USX volume
- Other VA for other services
Configuration
When the management VA has been deployed and powered on, you can use a browser (works with most type of recent browsers) and connect to the IP address of the management VA. Default username and password are admin/poweruser.
The web interface is really nice and fast, but it’s not always so clear and user friendly, for example the save button is not always easy to find.
You have to follow 5 different steps, some are really easy, other require some information.
 Prior to getting started with these steps, you can review the global preferences (Settings –> Preferences from the top right corner) and make a couple basic adjustments.
First step is quite easy: you have to enter a friendly name for your VM Manager (strange name, but it’s just your vCenter Server), IP Address/DNS, Username, and Password. Considering that USX will be potentially multi-hypervisor the generic name “VM Manager” has been choosed instead of a more specific name.
Step two it’s also simple: you have to select the applicable hosts and local storage from the list of available options:
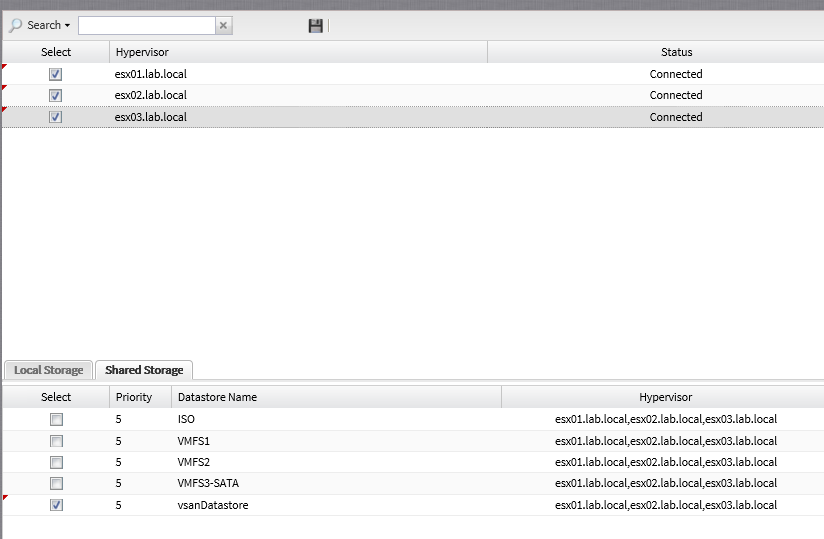
Note that you can also use Virtual SAN storage, or, of course, other type of storage (for VMware, all supported datastore).
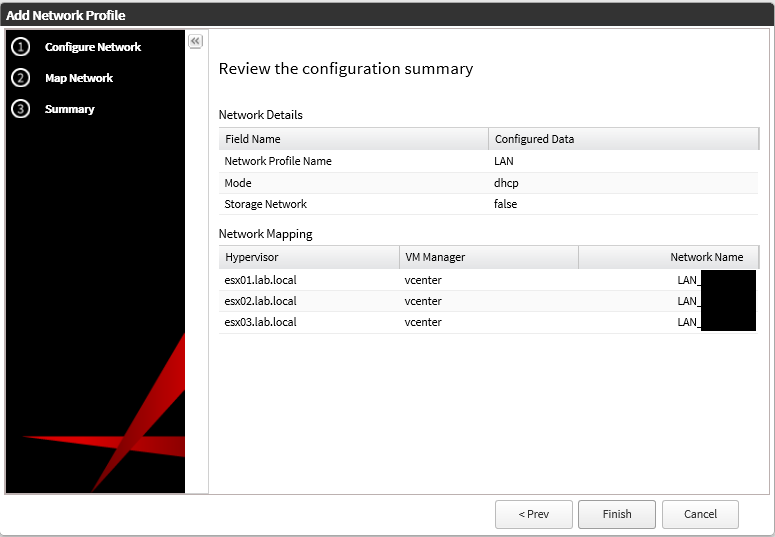
Step 3 require more informations because you need to specify the network that you are using. Also USX gives you the option to isolate storage traffic from management traffic, if you have a non-routed iSCSI/NFS network for example. Isolating this traffic allows you to have ICMP/SNMP tools monitor the routed interfaces, while keeping the NFS/iSCSI exports on dedicated back-end networks.
You can specify your LAN network:
 And your storage network:
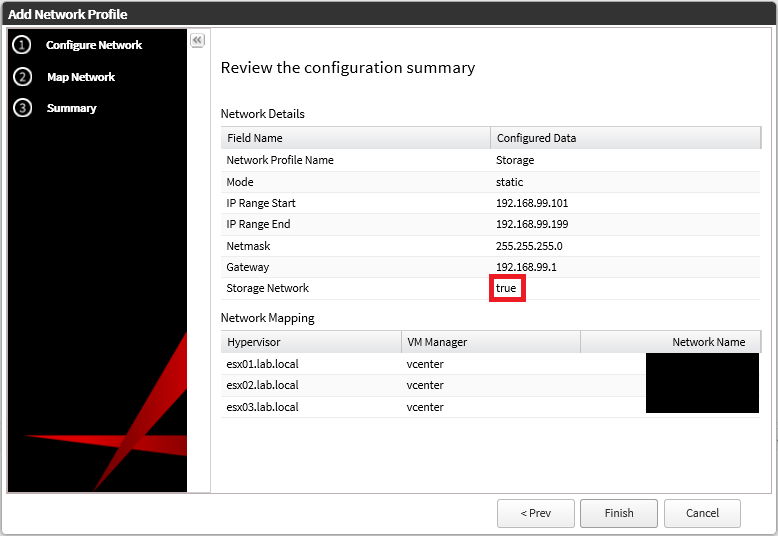
In both cases you have to specify the IP management (DHCP or range of static IP) and the network name (the VMware virtual switch portgroup, that could be on a standard or on a distribuited virtual switch).
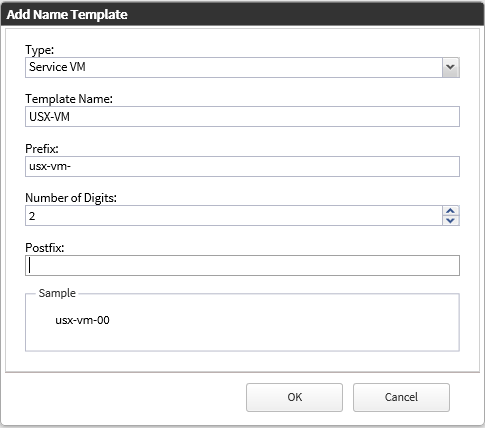
Step 4 is about the VM template that you will use for the deployment of other VA that are required. You have to define a VM naming convention and pattern:
And then wait for the VA deployment (that will be completly automatic):

Finally step 5 is the phase where you create the volumes!
Volume Types
There are different volume types available in USX 2.0:
- Hybrid (SAN/NAS or Local Storage): is a converged storage architecture and is the default VV type. The Hybrid volume type uses both a memory pool and a capacity pool to provide consistent performance across a wide variety of underlying storage.
- All Flash: flash arrays are pooled and optimized in a memory pool, or in a capacity pool that may use other storage such as shared SAN/NAS.
- In-Memory: memory is used both to accelerate performance and as primary storage. This configuration is not persistent, but data resilience is built-in by replicating data in memory on each of the servers from which memory is pooled.
- Simple Hybrid (Equivalent to disk-backed ILIO)
- Simple In-Memory (Equivalent to diskless ILIO)
The two Simple volume types were introduced in USX 2.0 to accommodate Virtual Desktop Infrastructure (VDI) and Server Based Computing (SBC) scenarios, while the other three were available in previous versions of USX.
For the volume creation phase, you’ll see the five different options:
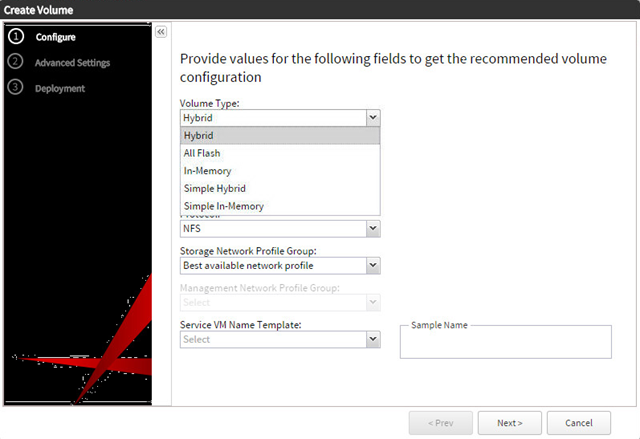
Of course, depending by the different volume type you will have diffent scenarios and diffent results.
In this case, when you deploy a in-memory volume you will have different VA that are powered-on:
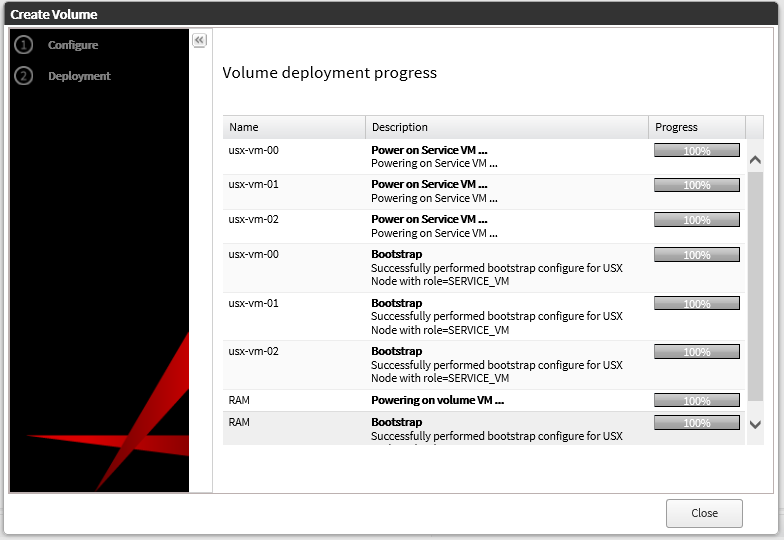
The user guide describe the diffent scenarios and also the different settings.
After this, you can mount (from the Atlantis management interface by click Actions and ‘Mount Volume’) a new VMware datastore and you can start to use as a common datastore. But on the Atlantis management you will have a lot of visuals and statistics about the volume under the Manage section (more data is available under Analytics). Once the VM has fully fired up, each of these fields will start to populate data.

And you have not finish yet. You have to enable, for example, HA at USX side by click the Actions button and select ‘Enable HA’:

The USX manager will deploy a new VA: the HA VM.
For more general information about the product see also those previous posts:
- VMworld EU 2014 Report – Atlantis Computing
- Atlantis Computing announces ILIO for VMware Virtual SAN
- #VFD3 – Atlantis ILIO USX – The RAM speed for your storage

Related Posts

Andrea Mauro
Virtualization, Cloud and Storage Architect. Tech Field delegate. VMUG IT Co-Founder and board member. VMware VMTN Moderator and vExpert 2010-24. Dell TechCenter Rockstar 2014-15. Microsoft MVP 2014-16. Veeam Vanguard 2015-23. Nutanix NTC 2014-20. Several certifications including: VCDX-DCV, VCP-DCV/DT/Cloud, VCAP-DCA/DCD/CIA/CID/DTA/DTD, MCSA, MCSE, MCITP, CCA, NPP.
