

This post is also available in: Italian
Reading Time: 7 minutesIn the previous post I’ve talk about 3CX and their main product (3CX Phone System), its characteristics and the different users cases. Now it’s the turn to describe the installation, that it’s really simple, easy and fast, and also well describe in the Administrator Manual.
As written this product require a Windows operating system, but it support several version, included client edition of Windows. From NT 6.1 (Windows 7 and Windows Server 2008 R2) almost are supported, but installations on Microsoft Windows server Core versions is not supported. Installations on Small Business Server 2008 are not recommended. However if you wish to use SBS, ensure that you use Abyss as a web server.
Windows embedded or Windows Storage Server are not listed, but I guess that it can work without big issues and can be interesting to build customized appliances.
This is a full list of supported OS:
- Windows 7 Professional (x64)
- Windows 7 Ultimate (x64)
- Windows 7 Enterprise (x64)
- Windows 8 Pro (x64)
- Windows 8 Enterprise (x64)
- Windows 8.1 Pro (x64)
- Windows 8.1 Enterprise (x64)
- Windows 2008 R2 Foundation (x64 only)
- Windows 2008 R2 Standard (x64 only)
- Windows 2008 R2 Enterprise (x64 only)
- Windows 2008 R2 Datacenter (x64 only)
- Windows 2012 Foundation (max. 15 presence connections on IIS installations)
- Windows 2012 Essentials (max. 25 presence connections on IIS installations)
- Windows 2012 Standard
- Windows 2012 Datacenter
- Windows 2012 R2 Essentials (max. 25 presence connections on IIS installations)
- Windows 2012 R2 Standard
- Windows 2012 R2 Datacenter
The hardware requirement can vary from Intel Atom CPUs with 4GB of RAM up to a multi socket/core system with 8GB or more. General guidelines can be found online in these articles, but mainly it depends by how many simultaneous calls, how many client and if you are using specific functions like voice recording.
As written it can be install on physical systems (also on Atom based motherboard, that can make possible build VoIP “appliances” with low cost and small systems) but also in a virtual environment, considering that it’s certified to run on VMware vSphere (from vSphere 5.x and above) or Microsoft HyperV (2008 R2 and above).
Note that there isn’t a VA (Virtual Appliance) ready to use… the installation does not differ from physical to virtual: you have first to prepare a Windows system and then install and configure the software. Note also that the HyperV VM running 3CX Phone System requires specific settings in order to be sure that the MAC address remain static (for more information see this link).
Note that the product does not require a DBMS to work and does not have any roles or component that can or should spit on multiple server… it’s just a set of services to run on a single system.

If you need an high availability you can choose two different way:
- run the services in a VM and use the underlying HA level (VMware HA or Microsoft Fail-Over cluster for Hyper-V VM)
- build a clustered configuration by following this guide
For most user cases the virtualization approach could be good enough, considering also that you can use features like VMware FT to increase the HA level (for small and medium environment the VM can also have a single vCPU… for large environment vSphere 6.0 and the new FT could be another solution).
Before start you have to install your Windows system, be sure to have a static IP (and a static MAC address), exclude the antivirus from some directory (C:\Program Files\3CX PhoneSystem\ and C:\ProgramData\3CX\), install the Microsoft .NET Framework version 4.5 or higher and be sure to have connectivity to some 3CX site (HTTPS to erp.3cx.com and HTTP to downloads.3cx.com).
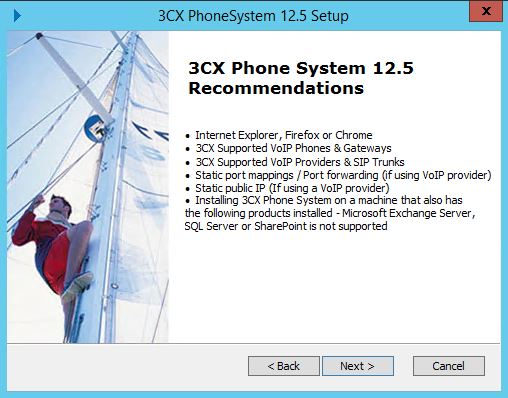
Now you can download the latest version of 3CX Phone System from the product web site and run the set-up by double-clicking on the set-up file. All the system requirements are listed in the first two screens:

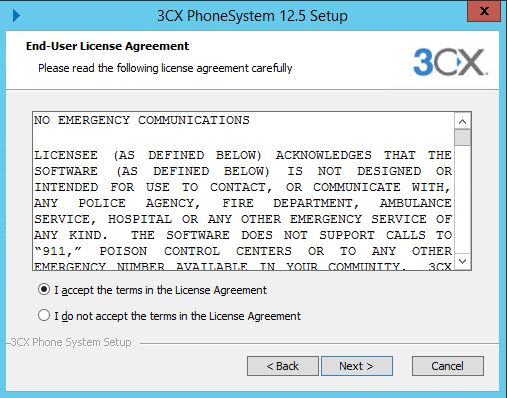
You will be asked to review and accept the license agreement:
Then you can select the installation folder path. 3CX Phone System will need a minimum of 10GB free hard disk space. You will need to reserve additional space to store voicemail files, recordings & voice prompts. You can choose only the main folder but then you can adjust other folders from the configuration settings.

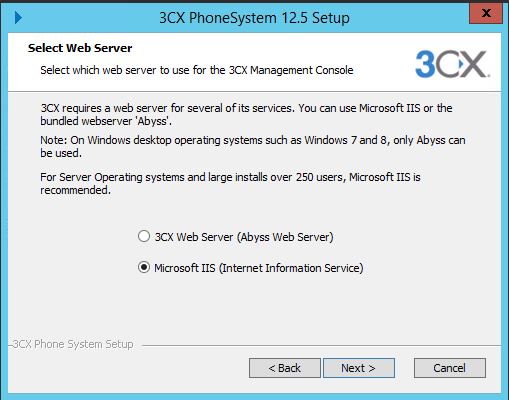
The product has a web interface for the management, and could run on IIS (default option) or using an embedded web server (during the installation you can use which one you want to use). For some client operating system or for SBS you need to use the Abyss Web Server. Otherwise ISS is recomended.
Now you can choose which ports you want assign for the web management:
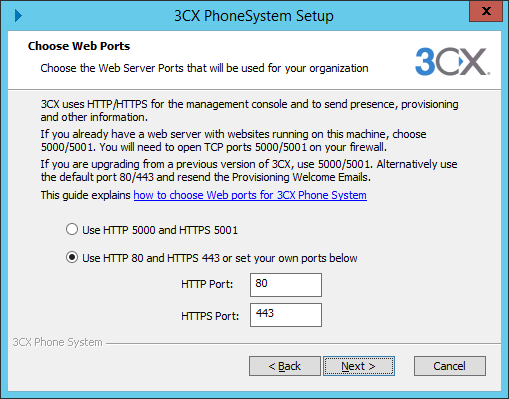
By default it will use ports 5000/5001. If you are upgrading from a previous version of 3CX Phone System, or already run a web server on your machine you should keep those ports. Alternatively use the default ports 80/443 and resend the Provisioning Welcome Emails. Make sure that the ports you choose are forwarded to the 3CX Phone System machine.
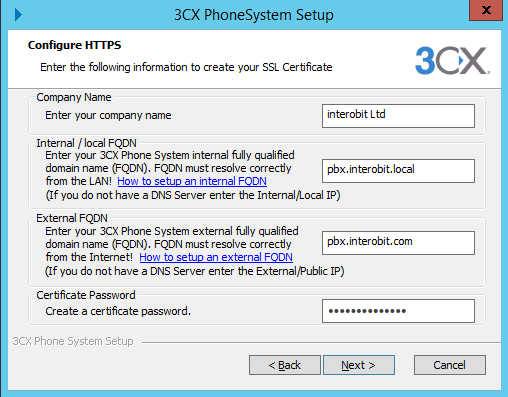
At this point you can configure the HTTPS and the certificate part by providing the internal and external FQDN and the certificate password:
At this point, if you wish to review installation settings click “Back” (note that there isn’t a specific summary screen, you have to go back on each windows), otherwise click “Install” to start the installation of 3CX Phone System.
Setup will now copy all files and install the necessary Windows services. When setup has completed, the 3CX Phone System Configuration Wizard will start. To complete the install and proceed to configure your system click “Finish”.
![]() You will notice two new icons on the desktop and by using the second one you can start with the configuration part.
You will notice two new icons on the desktop and by using the second one you can start with the configuration part.
As you can see the installation is really easy and fast, just because the real work will be done thought the web management interface.
About the client installation (if you want to use the native client), also this part is really easy and simple: for the mobile devices (iOS and Android) you have to search the 3CX Client directly in the native store.
For the Windows version you have to run (as an Administrator) the setup file. Visual C++ 2010 binaries are required, but those will be automatically installed by the setup:

All products are available from the 3CX site and actually there is the version 12.5 of the product:
- Download 3CX Phone System Setup File
- Download the Windows Client (3CXPhone for Windows)
- Download Android Client (3CXPhone for Android) from Google Play
- Download iPhone Client (3CXPhone for iPhone) from the App Store
- Download the Mac Client (3CXPhone for Mac)
Disclaimer: 3CX was a recurring sponsor on my blog, but I’m not obliged to blog. Furthermore, the content is not reviewed, approved or published by any other person than me.

Related Posts
Andrea Mauro
Virtualization, Cloud and Storage Architect. Tech Field delegate. VMUG IT Co-Founder and board member. VMware VMTN Moderator and vExpert 2010-24. Dell TechCenter Rockstar 2014-15. Microsoft MVP 2014-16. Veeam Vanguard 2015-23. Nutanix NTC 2014-20. Several certifications including: VCDX-DCV, VCP-DCV/DT/Cloud, VCAP-DCA/DCD/CIA/CID/DTA/DTD, MCSA, MCSE, MCITP, CCA, NPP.
