This post is also available in: Italian
Reading Time: 7 minutesPernixData FVP is a Flash Hypervisor software aggregates server flash across a virtualized data center, creating a scale-out data tier for accelerating reads and writes to primary storage in a simple and powerful way. Was one of first (probably the first) to implement a fault-tolerant write back acceleration.
In the previous post I’ve described the installation procedure of FVP 1.5 on vSphere 5.5, now it’s the turn of the configuration phase.
PernixData FVP configuration is really simple and could be handled with the old vSphere Client or also with the new vSphere Web Client (starting from FVP 1.5). Both have the same functionalities and similar behavior.
 Using the vSphere Client you will see a new tab (called PernixData) in cluster, host and VM object (remember that you need to install the plugin in order to use the vSphere Client).
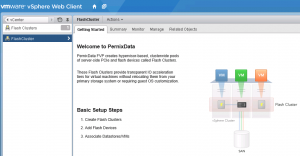
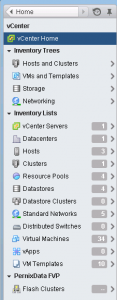
Using the Web Client you will notice a new area at the bottom of your inventory pane (note that you don’t need to configure nothing in order to use the Web Client).
I’ve tested with both tools, but the following screenshots are only for the Web Client configuration case.
The wizard really help you in follow all required steps to build your Flash Cluster (or also more then one):
First to all, you define a name for your first Flash Cluster and associate it with your vSphere Cluster. At this point you can select your Flash devices:
Usually only free (unformatted and unpartioned) disks are shown, but you can also see other devices using “show all device”; this could be useful to understand the reason with other devices are not show, like for example the existing VSAN partitioning (this is really useful compare, for example with VSAN, where you have not easy evidence on why some devices are hidden).
A simple way to scratch a disk (without using the partUtil from CLI or specific hardware commands) is just add it as a datastore and then delete it.
Note that the used disks are not marked as used in the vSphere interface, so you can make the big mistake to format them when you add a new datastore (could be nice, in future release to use the filtering option and just hide those disks from the available).
After this you can associate your Flash Cluster to one or more datastore:
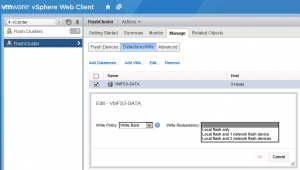
Note that by default the datastore is only read accelerate (write though), but you can also select the options and tune it for the write using different write back functions:
Write back (that represent the write acceleration) could be:
- Local flash only: write are performed on the local cache and then on the real storage. Not recommended in production, but useful in test environments and in some special cases.
- Local flash and 1 network flash device: write are performed on the local cache and synchronous on one other flash on another host. This can guaranteed a N+1 availability level and could be fine for small/medium environments.
- Local flash and 2 network flash device: write are performed on the local cache and synchronous on two other flash on other hosts. This can guaranteed a N+2 availability level and could be interesting for medium/big or really critical environments.
Note that you can define different cache policy for different datastores and also for different VMs in a really completely granular way.
Also note that write back with redundancy needs good and fast network links across the hosts. Under the advanced tab you can configure which network will be used for redundancy data replication across flash devices (by default will be the vMotion network):
In a production environment a 10 Gbps links could be a good and recommended choice, considering also that you can specify only one interface per host.
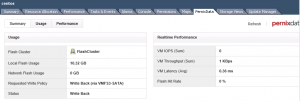
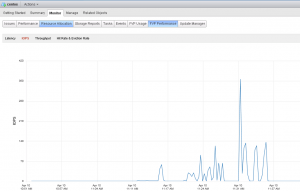
Now you can see and monitor the improvements of your VMs:
Note that, on datastore side, the multi-path policy will be preplaced with a new one specific for PernixData, like in this example:
License
Without any license this product will run in full mode for the evaluation period. After it a license activation will become mandatory. It could be done online (but require a Java program that must be installed) or offline, that is little longer, but does not require any special software or permission.
To perform offline activation, follow these steps:
- Download license signature file of your environment from the Management interface (advanced options).
- Upload license signature file to PernixData Licensing Portal, enter the product key that was provided via email upon license purchase, click the “Offline Activation” button, and then select the file downloaded in step 1 for the “Upload C2V” field.
- Download license activation file from PernixData Licensing Portal. You will be able to download this file from the PernixData Licensing Portal immediately after uploading your signature file.
- Upload license activation file.
Any issues?
So it’s really so easy without any issues? Honestly I’ve got some minor issues during the configuration.
Some issues where related to VMs during the Storage vMotion operation: at least avoid this kind of operation (but also deployment or cloning) during the activation of the Flash Cluster. This step seems critical and if some VMs have pending operations they could remain in this state inside PernixData FVP:
I was not able to fix this VM from this state (where it wasn’t accelerated). With the CLI probably there is a way. But I’ve just redeploy the VM.
Similar issues was with VMware DPM: be sure that all hosts are powered when you activate the Flash Cluster, otherwise the standby hosts may be not recognized later: in this case the solution it’s simple and consist in remove and recreate the Flash Cluster.
Other resources
See also those other blog post on PernixData FVP configuration and usage:


