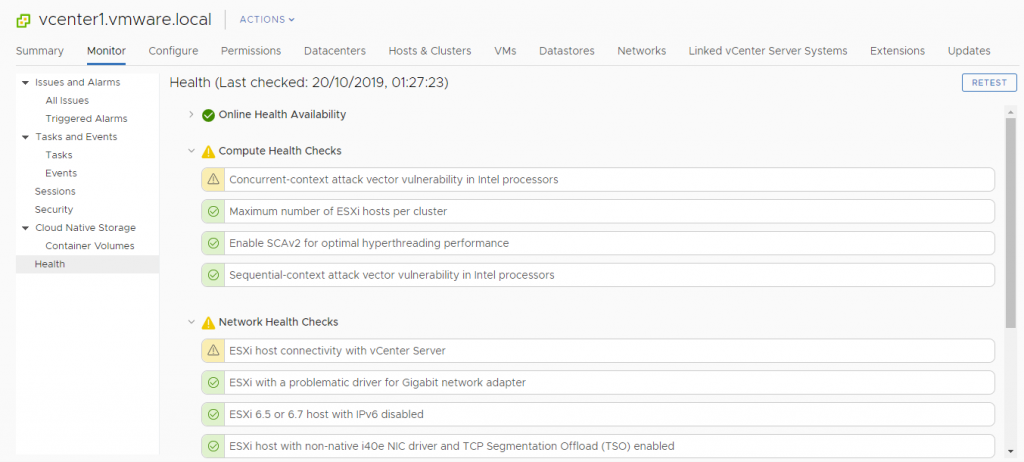
One interesting news of the latest version of vCSA is the health monitoring feature.
You can check the overlall health with your vSphere Client, by selecting the vCenter node and then Monitor | Health.
As explained in this blog post, vSphere Health works to identify and resolve potential issues before they have an impact on a customer’s environment and contains more than 30 different health checks that can be run against a vSphere environment.
Usually it checks for bad drivers, CPU bugs, know problems.
But it also make some tests to check some services or measure some latency.
One test that can fail is about the latency between vCenter Server and the ESXi host, expecially in a vSAN environment where the vCSA (or the ESXi hosts) may be busy.
You may see this warning message:
ESXi host connectivity with vCenter Server

Note that in this case there is also a warning for some hosts that are not patched for CPU specific bugs.
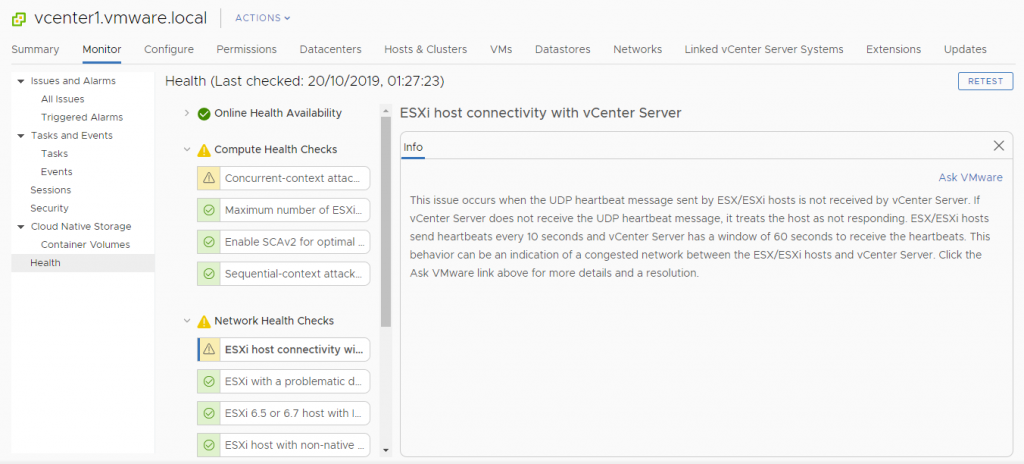
If you click on the warning message you will have a better problem descrition:
This issue occurs when the UDP heartbeat message sent by ESX/ESXi hosts is not received by vCenter Server. If vCenter Server does not receive the UDP heartbeat message, it treats the host as not responding. ESX/ESXi hosts send heartbeats every 10 seconds and vCenter Server has a window of 60 seconds to receive the heartbeats. This behavior can be an indication of a congested network between the ESX/ESXi hosts and vCenter Server. Click the Ask VMware link above for more details and a resolution.

As written the problem could be related to high load of vCSA and/or hosts, but of course it could be also really related to network issues.
If the network is fine you can increase the timeout of this check using the VMware KB 1005757 article (ESXi host disconnects intermittently from vCenter Server).
To increase the timeout limit: vSphere Client:
- Open the vSphere Client.
- Connect to vCenter Server.
- Select Administration > vCenter Server Settings to display the vCenter Server Settings dialog box.
- If the vCenter Server system is part of a connected group, select the server you want to configure from the Current vCenter Server dropdown.
- In the settings list, select Advanced Settings.
- In the Key field, type:
config.vpxd.heartbeat.notRespondingTimeout
- In the Value field, type:
120
- Click Add.
- Click OK.
- Restart the vCenter Server service.


