
The L1 Terminal Fault (aka Foreshadow) bug is another speculative execution side channel attack that affects Intel Core processors and Intel Xeon processors only.
For VMware vSphere, there are some patches available as described in this document: VMSA-2018-0020. All patches have been released on August, 14th 2018.
| VMware Product | Product Version | Running On | Severity | Replace_with/Apply_Patch | Build |
|---|---|---|---|---|---|
| VC | 6.7 | Any | Important | 6.7.0d | Build 9451876 |
| VC | 6.5 | Any | Important | 6.5u2c | Build 9451637 |
| VC | 6.0 | Any | Important | 6.0u3h | Build 9451619 |
| VC | 5.5 | Any | Important | 5.5u3j | Build 9313450 |
| ESXi | 6.7 | Any | Important | ESXi670-201808401-BG* ESXi670-201808402-BG** ESXi670-201808403-BG* |
Build 9484548 |
| ESXi | 6.5 | Any | Important | ESXi650-201808401-BG* ESXi650-201808402-BG** ESXi650-201808403-BG* |
Build 9298722 |
| ESXi | 6.0 | Any | Important | ESXi600-201808401-BG* ESXi600-201808402-BG** ESXi600-201808403-BG* |
Build 9313334 |
| ESXi | 5.5 | Any | Important | ESXi550-201808401-BG* ESXi550-201808402-BG** ESXi550-201808403-BG* |
Build 9313066 |
*These patches DO NOT mitigate the Concurrent-context attack vector previously described by default. For details on the three-phase vSphere mitigation process please see KB55806and for the mitigation process for Workstation and Fusion please see KB57138.
**These patches include microcode updates required for mitigation of the Sequential-context attack vector. This microcode may also be obtained from your hardware OEM in the form of a BIOS or firmware update. Details on microcode that has been provided by Intel and packaged by VMware is enumerated in the patch KBs found in the Solution section of this document.
Of course, vSphere previous v5.5 are no more supported and there is no solution for them. And also vSphere 5.5 will go out of support soon!
But patching is just a step in the entire flow process:
As described in VMware KB 55806, the mitigation process for CVE-2018-3646 is divided into three phases:
- Update Phase: Apply vSphere Updates and Patches
- Planning Phase: Assess Your Environment
- Scheduler-Enablement Phase: Enable the ESXi Side-Channel-Aware Scheduler
But of course, there is also the phase 0 needed to identify if your system is affected. In this RuneCast can help you (as happened with Spectre and Meltdown).
Then you have to apply the patches and in this case is very important to upgrade the vCenter FIRST and then the ESXi hosts. If you patching ESXi before their vCenter Server there can be a generic error such as xxx esx.problem.hyperthreading.unmitigated.formatOnHost not found xxx or esx.problem.hyperthreading.unmitigated.
For vCenter updating, with VCSA this could be managed simply with VAMI. For ESXi, VUM can help you.

Note that the L1TF related patches are (at least in vSphere 6.7) in the Non-Critical Host Patches baseline (sigh).
Note for VSAN users: seems that the VSAN baselines are not updated yet to include also this patch (in my case the VSAN 6.7 baseline remains on build 8169922). Maybe it’s just my problem, but I suggest to temporally add the non-critical patches baseline to proper patch your hosts.
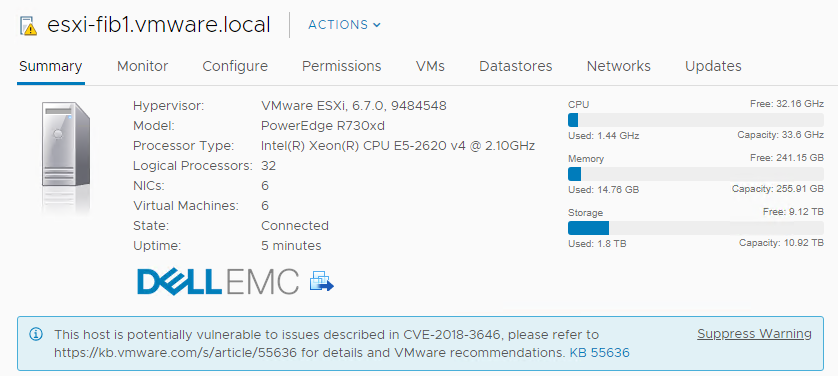
After the host remediation each affected host will have a warning alarm with the proper reference at the issue:
A now? Now you have to fix your host by enabling the ESXi Side-Channel-Aware Scheduler:
Using the vSphere Web Client or vSphere Client:
- Connect to the vCenter Server using either the vSphere Web or vSphere Client.
- Select an ESXi host in the inventory.
- Click the Manage (5.5/6.0) or Configure (6.5/6.7) tab.
- Click the Settings sub-tab.
- Under the System heading, click Advanced System Settings.
- Click in the Filter box and search VMkernel.Boot.hyperthreadingMitigation
- Select the setting by name and click the Edit pencil icon.
- Change the configuration option to true (default: false).
- Click OK.
- Reboot the ESXi host for the configuration change to go into effect.
- Connect to the ESXi host by opening a web browser to https://HOSTNAME.
- Click the Manage tab
- Click the Advanced settings sub-tab
- Click in the Filter box and search VMkernel.Boot.hyperthreadingMitigation
- Select the setting by name and click the Edit pencil icon
- Change the configuration option to true (default: false)
- Click Save.
- Reboot the ESXi host for the configuration change to go into effect.
Using the CLI with the esxcli command:
- SSH to an ESXi host or open a console where the remote ESXCLI is installed. For more information, see the http://www.vmware.com/support/developer/vcli/.
- Check the current runtime value of the HTAware Mitigation Setting by running esxcli system settings kernel list -o hyperthreadingMitigation
- To enable HT Aware Mitigation, run this command: esxcli system settings kernel set -s hyperthreadingMitigation -v TRUE
- Reboot the ESXi host for the configuration change to go into effect.
Why is this remediation not active by default? Good question… the main answer seems to be the possible performance/capacity impact. How huge is performance degradation? Could be around 30% but a correct answer requires to read carefully the VMware KB 55767. The reality is that the degradation depends on the cluster usage level and is directly correlated to it.
But CPU usually is not a bottleneck and security by default must be the first approach… So, in my opinion, was better enable by default and then let the administrator choose if disable it.
Considering also that enable later means that you need a second host reboot, this becomes very time to consume, especially in a hyper-converged cluster where you need to reboot (usually) hosts sequentially one by one.
VMware has provided a tool (basically a PowerCLI script) to assist in performing both the Planning Phase and the Scheduler-Enablement Phase at scale. The tool is called HTAware Mitigation Tool and can be found in KB56931 along with detailed instructions on its usage, capabilities, and limitations.
Basically, you can extract the ZIP file and import the module. But the module is not signed, so the first step is to change the execution policy:
Set-ExecutionPolicy -Scope CurrentUser -ExecutionPolicy Unrestricted
Then, you can import the module:
Import-Module .\HTAwareMitigation.psd1
Connect to the vCenter server:
Connect-VIServer -Server vcenter.lab.local
Start the analysis:
Get-HTAwareMitigationAnalysis
And remediate all the hosts (but first check for a possible performance impact):
Set-HTAwareMitigationConfig .\output.csv -Enable
The remediation will only apply the advanced setting value, but you need to reboot your host after the process:
Processing ESXi host esxi1.lab.local ...

Unable to find HT-aware mitigation setting, ESXi host may not have been patched ...

Processing ESXi host esxi2.lab.local ...

Successfully updated "VMkernel.Boot.hyperthreadingMitigation" to True
If a host has not been patched properly, the script will return a message like this: “ESXi host may not have been patched”.
Note that the script does not check if the setting is already present and also does not provide (yet) the reboot orchestration flow.
Important: Some vendors or other OSes suggest to disable Intel Hyperthreading in firmware/BIOS (you can also disable via ESXi using VMkernel.Boot.Hyperthreading). But VMware does not recommend this operation because it precludes potential vSphere scheduler enhancements and mitigations that will allow the use of both logical processors. As such, disablement of hyperthreading to mitigate the Concurrent-context attack vector will introduce unnecessary operational overhead as hyperthreading may need to be re-enabled in the future.
See also:
- L1 Terminal Fault (L1TF) Patching Considerations
- VMware response to ‘L1 Terminal Fault – VMM’ (L1TF – VMM) Speculative-Execution vulnerability in Intel processors for vSphere: CVE-2018-3646 (55806)
- HTAware Mitigation Tool Overview and Usage (56931)
- VMware Performance Impact Statement for ‘L1 Terminal Fault – VMM’ (L1TF – VMM) mitigations: CVE-2018-3646 (55767)

Related Posts
Andrea Mauro
Virtualization, Cloud and Storage Architect. Tech Field delegate. VMUG IT Co-Founder and board member. VMware VMTN Moderator and vExpert 2010-24. Dell TechCenter Rockstar 2014-15. Microsoft MVP 2014-16. Veeam Vanguard 2015-23. Nutanix NTC 2014-20. Several certifications including: VCDX-DCV, VCP-DCV/DT/Cloud, VCAP-DCA/DCD/CIA/CID/DTA/DTD, MCSA, MCSE, MCITP, CCA, NPP.
