 Reading Time: 4 minutes
The PowerEdge™ R720 server is one of the 12G models of Dell server’s portfolio. By working for a Dell’s partner I’ve got the opportunity to test one and those are my consideration.
Of course processors are new (Intel® Xeon ® processor E5-2600 product family), but Intel (the last 0 mean that is an Intel server) does not help due to strange choice in the numbers of the Xeon series (I’ve already talk about it in the post Greater number is always better? For Intel maybe no) … The silly aspect is that an old R810 with dual E7 Xeon cost more than a new R720.
About the it can grow to 768GB, due to 24 DIMM Slots. Quite enoght for most virtualization project.
Connectivity is really rich with some integrated, but also modular, NIC: you can choose 4x1Gbps or 2x10Gbps and also the vendor (Broadcom or Intel). And you can expand with a lot of PCIe slots:
- 7 PCIe slots:
One x16 full-length, full-height
Three x8 full-length, full-height
Three x8 half-length, half-height
The layout is very simple and functional, and also well documented… included a QR code for the server model (and seems that a mobile app is also available, but I’ve not yet tested it).


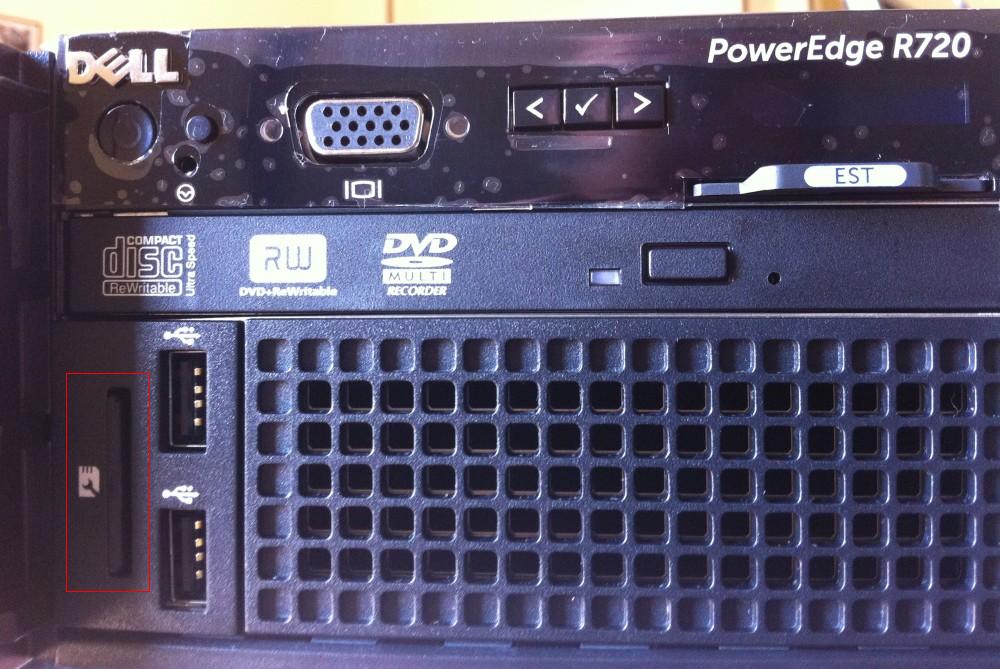
Frontal panel looks similar with previous version exept the vFlash media that now is on the front (and not on the iDRAC interface) and a great number of disk slots:
- 2.5″ Chassis with up to 16 Hard Drives
- 2.5″ Chassis with up to 8 + 8 Hard Drives and 2 Controllers
- 3.5″ Chassis with up to 8 Hard Drives
There is also a new RAID controller (PERC H710P Integrated RAID Controller, 1GB NV Cache), but seems similar to previous H700.

Internal is really clean:


SAS interfaces are simple to reach and there is also an internal SAS connector.


And the SD designed for the virtualization is now available in a dual configuration (previous only on the R810 and R910 models)… and still exist a (single) internal USB port:


But the amazing aspect of this server is that is really quiet and fans are really dynamic in speed. Also Dell has tested and validated an integrated data center solution that enables you to operate at higher temperatures or even chiller-less.
Note also that there is a different version called PowerEdge™ R720xd rack server. In this case the maximum Internal Storage is 38TB and you can use different disks configurations:
- Up to 24 x 2.5” (front) + 2 x 2.5” (back)
- Up to 12 x 3.5” (front) + 2 x 2.5” (back)
So it’s a good server for virtualizations (but probably also the R620 could be really similar) but also an interesting base for virtual storage, backup appliances, …


 Reading Time: < 1 minute