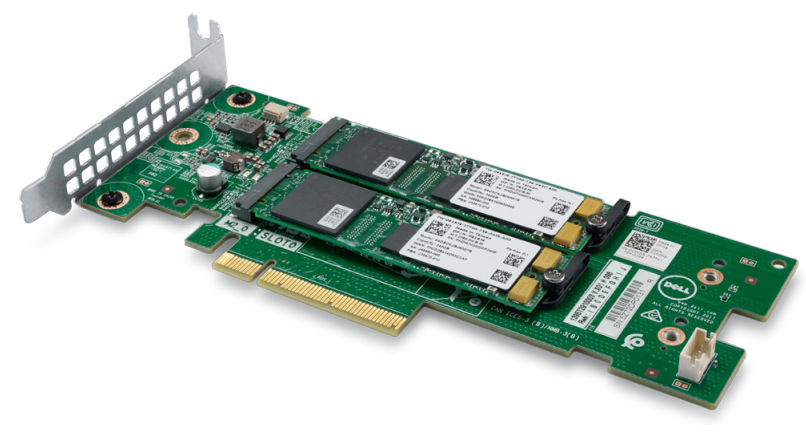
The Dell Boot Optimized Storage Solution (BOSS) is a new option for the installation of the hypervisor part, in a virtualization enviroment, or more important in a hyper-converged infrastructure (HCI) host!
The dual SD option was already present in all PowerEdge, also in previous generations, and was a good choice to separate the hypervisor from the disks or simple use diskless based solutions. And was a good option for vSphere ESXi when servers were only used as a compute nodes.
But who is implementing HCI or also simple SDS solution, need to separate their OS drives from data drives and, of course, they require Hardware RAID Mirror (RAID1) for the operating system drives.
With the PowerEdge G14 series, the BOSS card was introduced and provides this separate HWRAID functionality for the OS drives while also freeing up additional drive slots to be used for ‘data set’ devices.
Basically it’s a PCI card with flash memory, so it’s fast enough and provides just a block level service like other disks.
BOSS-S1 utilizes one or two read-intensive (Boot Class) 80mm M.2 SATA Solid State Devices (SSDs) which can be used in “pass-thru” or two devices in Hardware RAID 1 (mirroring). The M.2 devices are Read Intensive 120GB/240GB. The PCI card is a single x2 PCIe Gen 2 host interface (x8 connector).
M.2 means that you cannot hot-swap the device, also because they are con a PCI-e card inside the case. But that server’s case can be opened on a running server (if you have the proper rails and cable arm manager)… but the M.2 cannot be replaced on a running system.
Not so different compared to the dual redundant SD card, also in this case you need to power-off the host in order to replace a faulty device. Not as beauty like a dual hot-swap hard disks solution, but reasonable for the use cases (build HCI clusters).
There is also another reason why you need to reboot the system: you can only configure the BOSS card with the BIOS/UEFI, that means that you have to reboot your system to enter in this utility.
When you power-on a PowerEdge server with the BOSS card, you can pess F2 to enter System Setup, and then choose Device Settings > BOSS-S1 Configuration Utility.
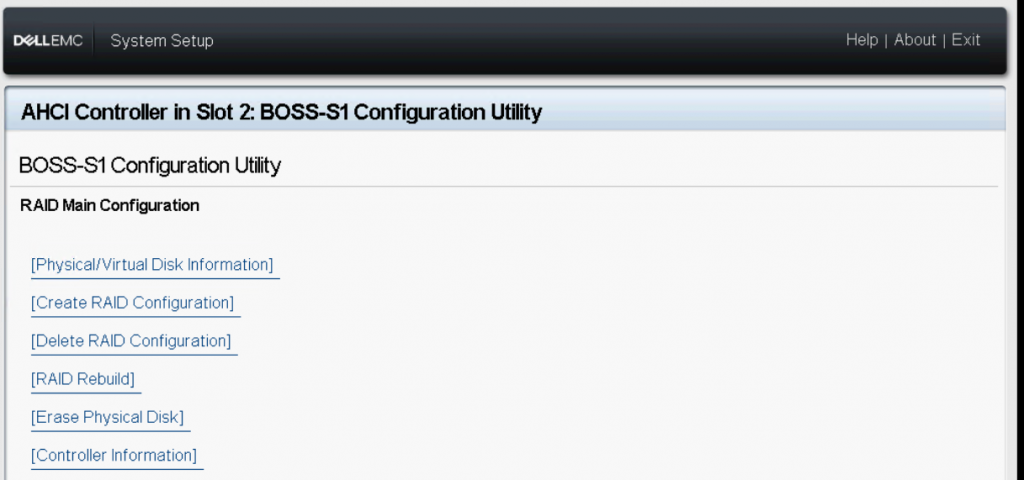
From this menu you can manage the different BOSS card functions.
For example, to check the installed M.2 devices you can choose Physical Disk Information:

If you select one disk, you can read all the detailed information, and verify it’s status (in the followin example Unconfigured):
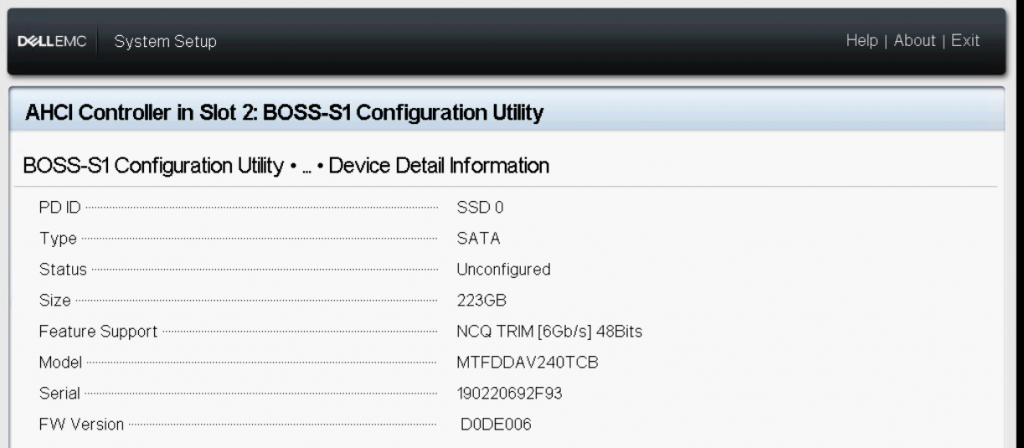
Note that you can also verify the firmaware version of your disks.
To build a new RAID-1 configuration you can select Create RAID Configuration that will display the available M.2 disks:
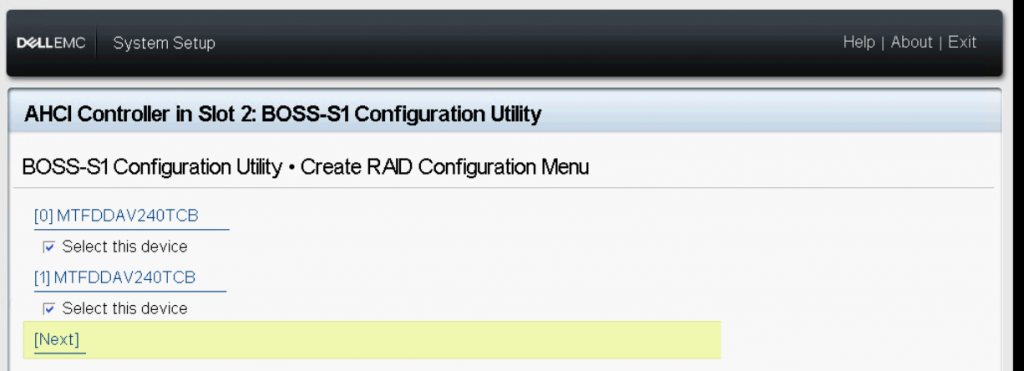
You can select the two M.2 SATA physical disks and then click Next to proceed to next page.
Choose the appropriate options as required, and type the name for the virtual disk:
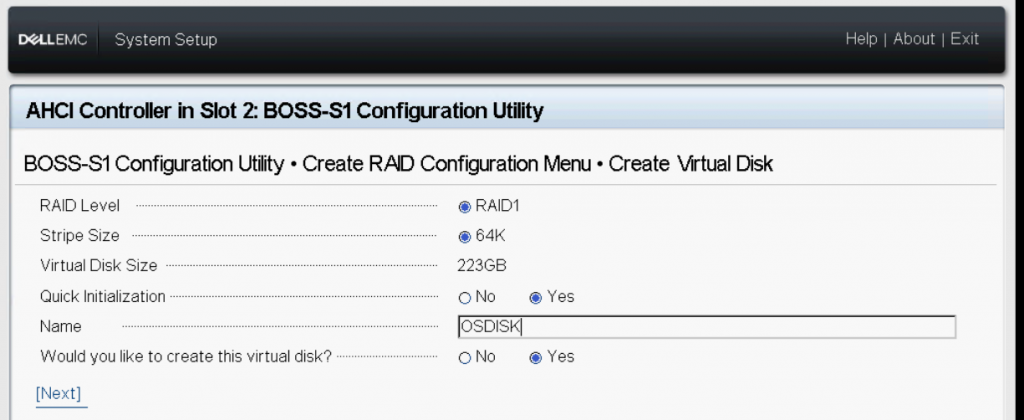
To build the mirrored disk configuration you must select Yes for the “Would you like to create virtual disk?” option and then click Next to proceed to next page.
Virtual disk is created successfully and you can verify the virtual disk information at the BOSS-S1 configuration Utility > Physical/Virtual Disk information .
The created virtual disk is displayed in the Virtual Disk Info.
Note that, at this time, you cannot build a RAID-1 configuration from one disk but only from scratch. This mean that when you create a Virtual Disks, ALL DATA ON M.2 DISKS WILL BE ERASED!
Not much useful, but limited by this card version (or maybe upgradable with a future firmware versions).
In case you have buy the BOSS card with only one M.2 disk and you decide for a redoundant configuration later, you need to reinstall everything!

